Showing posts with label baking. Show all posts

Thursday, 11 July 2013

Taste the rainbow!

Anyone who knows me will know that I adore baking and decorating cakes, so when my niece's 6th birthday was coming up, of course I offered to bake her cake!  I really have no idea what she is into right now because every time I ask her she gives me a different answer, so I asked her what her favorite color is.  She told me her favorite is light purple, but then later she came up to me and whispered that she really likes all the colors in the whole entire rainbow.  Well, of course I had to make a rainbow cake for her!  Now, I love for cakes to have a little bit of a surprise factor, and this one is no exception!  I made several 8" round cakes and cut them in halves so they would sit in a rainbow arch shape on the cake board.  I hollowed out the middle 3 layers and stuffed them full of skittles!  Then I put the outer layer on and sealed it up, iced it like a rainbow, added some little cake ball clouds and threw on some gold coins for the gold at the end of the rainbow.  Voila!  Nobody knows what is inside until it gets cut open when they get to "See the rainbow, Taste the rainbow" (get it, skittles reference!)


Wednesday, 10 April 2013

Peanut Chocolate Crisps

Recipe time! No bake too!

I have recently had some terrible luck with recipes I have found online. Some tasted horrible and some looked nothing like the pictures.  I was feeling very discouraged so it was time to go back to one of my tried and true faves; Peanut Chocolate Crisps!  I'm not sure where I got this recipe but I know I have changed it up from the original version I started with years ago.  Here is the recipe as it stands right now. Enjoy!


Peanut Chocolate Crisps


1/2 c. margarine
1 c. Semi-sweet chocolate chips
2/3 c. Kraft smooth peanut butter
1 bag (aprox. 40) large marshmallows
1 c. Roasted unsalted peanuts (halved)
6 c. Rice krispies cereal

Melt margarine, peanut butter and marshmallows in a pot over medium heat stirring continually.  When marshmallows are almost completely melted, add the chocolate chips and stir until they are melted.  Add the peanuts and rice krispies and stir until well blended.  Press into a greased 9x13 pan.  Let set until cool before cutting.  I suggest fairly small pieces as it is pretty rich.

If you wish you can coat them with a icing of sorts, I like using a mix of 1 c. Semi-sweet chocolate chips and 1 tbsp. Peanut butter melted and spread over the top. It will remain soft enough to cut through without dripping all over.


Thursday, 10 January 2013

Peanut Butter Banana Oatmeal Loaf

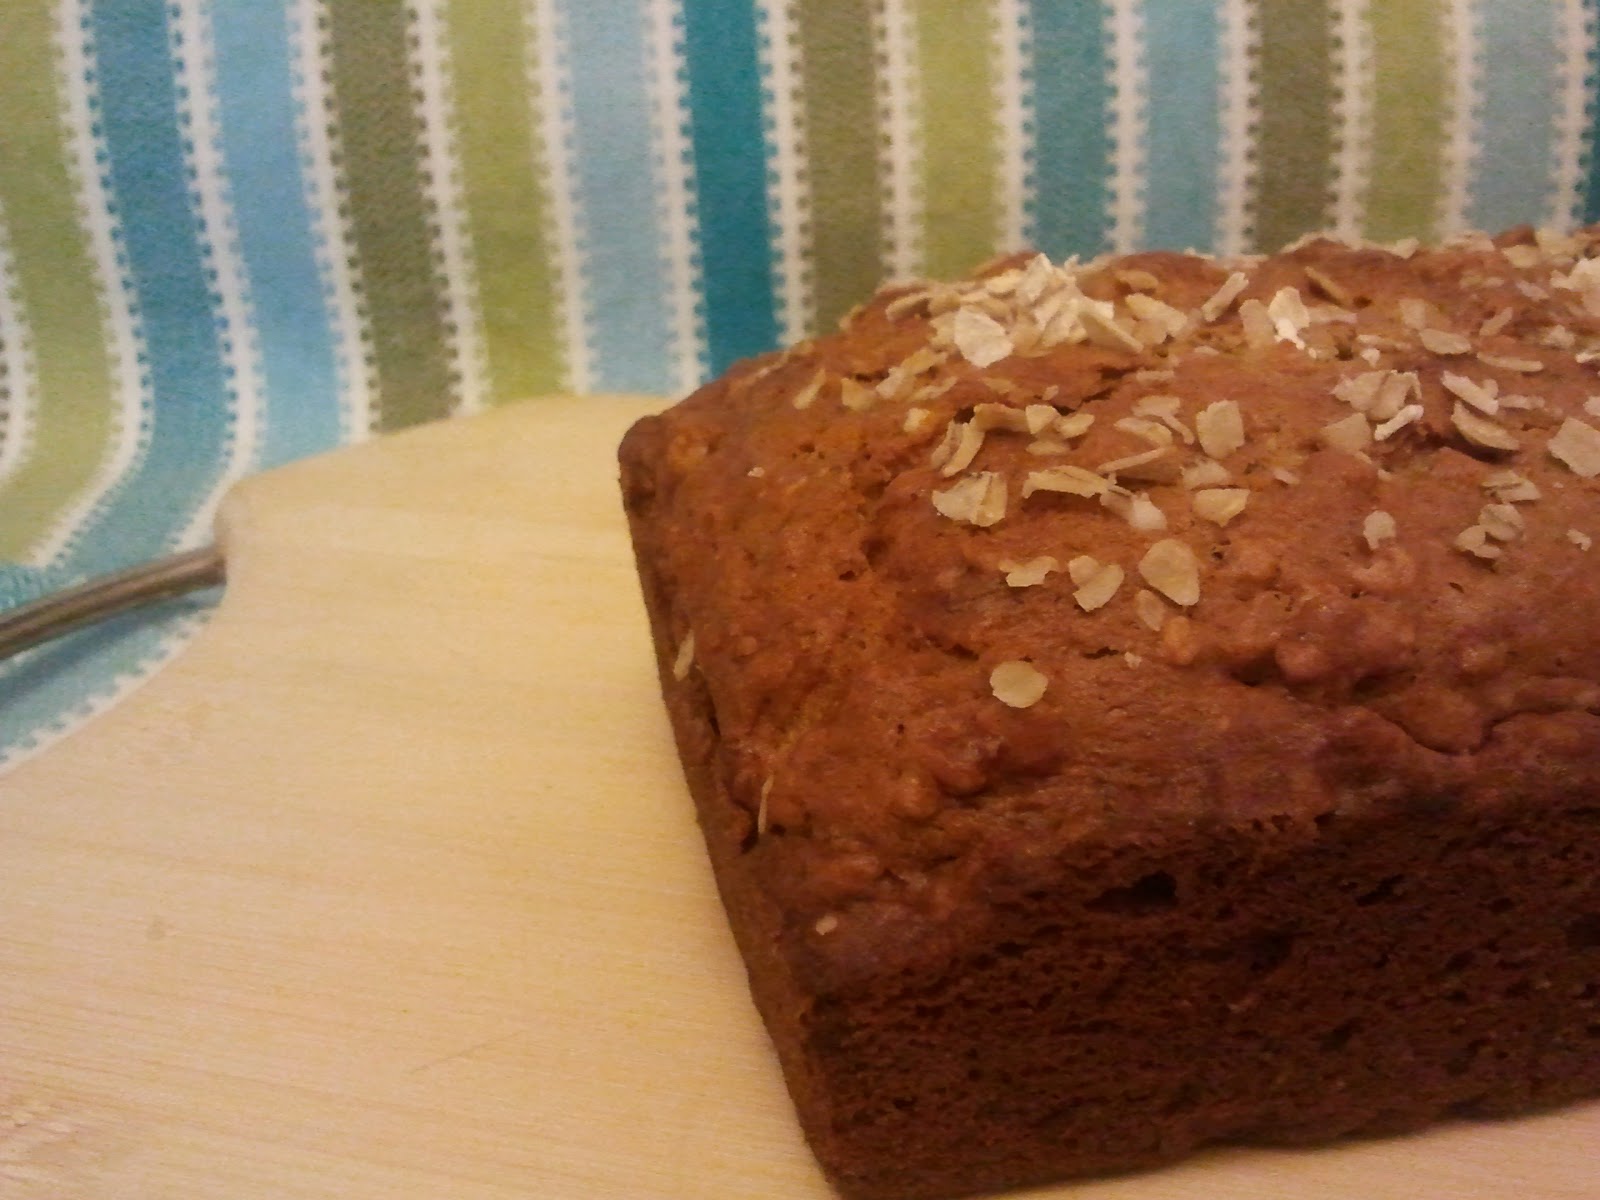
If you are anything like me, you pretty much only bake banana loaf when you have brown spotty bananas to use up!  Well, this time I didn't really want plain ol' banana loaf.  I felt like having something a little bit different, so I created a new recipe for Peanut Butter Banana Oatmeal Loaf!  I hope you enjoy it as much as we have been!
Peanut Butter Banana Oatmeal Loaf

Peanut Butter Banana Oatmeal Loaf

Peanut Butter Banana Oatmeal Loaf

Peanut Butter Banana Oatmeal Loaf

2/3 c. unsalted butter - softened
2 eggs
1/2 c. granulated sugar
1/2 c. brown sugar
1/4 c. skim milk
2/3 c. PB2 Powdered Peanut Butter (I got mine on Amazon.com)
1 1/2 tsp. baking soda
1 tsp. pumpkin pie spice
1 c. quick oats
2 c. all purpose flour
3 mashed bananas

Combine butter, eggs, sugar, milk and powdered peanut butter.  Mix very well as the powdered peanut butter tends to stay lumpy for a long time.  Combine dry ingredients and add to wet mixture.  Mix well.  Add the pre-mashed bananas. (I have noticed that if you just gently fold in the bananas without beating thoroughly, the loaf rises much nicer)  Bake for 45-50 minutes at 325°.  Cool a few minutes before removing from pan, then place on a wire rack for 5-10 minutes before slicing. (unless you are impatient like me and want to eat it warm fresh out of the oven!)

Bon Apetit!

*note: I sprinkled oats on top of the loaf before baking, but that was really just so it was aesthetically pleasing.  :)

Thursday, 3 January 2013

Easy (but look hard) Christmas cupcakes

I was lazy this year.  We had so much going on leading up to Christmas this year, the last thing I wanted to do was come up with a desert for supper.  Enter Betty Crocker Cherry Chip cupcakes!  I wanted to decorate them pretty, but like I said, I was lazy.  I started by whipping up a batch of fluffy white icing.  I then grabbed a random icing tip from my box, plugged it into a pastry bag, then painted a stripe of Kelly green Wilton gel coloring up one side of the inside of the bag, and a stripe of no-taste Red Wilton gel up the other.  Then I filled it with my plain white icing and just piped a spiral on each cupcake.  Adorable, no?


Monday, 26 November 2012

6th Birthday Awesomeness!

My dear sweet baby is growing up!  My son recently celebrated his 6th birthday, and if you know me at all, you know I love baking and decorating cakes.  We wanted an Avengers theme so we had some inflatable mallet things and all kinds of Avengers candies and junk. So much fun with 7 boys between the ages of 6 and 8 jacked up on sugar! HAHA!  Anyhow, back to the cake: my favorite part!  I wanted something special, and I know my son could care less about eating the cake, he just likes the idea of getting one and eating the icing, however he DOES love rice krispie cake...so I decided to combine the two for a specatcular combo of a Captain America shield (of cake) and a Thor hammer (of rice krispie cake)!

16" cake pan with a heating core filled with vanilla cake (some of which was dyed blue)

It took an entire bottle of Wilton Red Red gel coloring, and an entire bottle of Christmas Red to get my batch of red icing to not look totally pink!  I also added in a pouch of strawberry jello powder to give it a little extra something.


The Thor hammer was made in two parts, the handle which I coated in melted chocolate and then sculpted some lines into, then I formed the hammer head and frosted it with the vanilla buttercream and sprayed it with Duff''s edible silver spray.  It looked fantastic after it sat for a few hours.  The shine almost disappeared and it looked pretty much like Thor's hammer!


MMMMMMmmmmmm Tasty cake!!!


Friday, 26 October 2012

Baby Shower Cake!

A friend asked me to bake a cake for a baby shower, and of course I'm not going to say no.  I love baking!  She requested zebra print and left the rest up to me...although she did manage to score a deal on some Wilton Sugar Sheets in an awesome zebra print that made my life so much easier!  I thought to myself "you know what would be awesome?  If the cake itself was zebra print when you cut into it!"  Of course I really had no idea how to do this so I guessed, and (unfortunately I didn't get any pictures from when it was cut into, as it was at someone else's house at a baby shower I wasn't at) according to the guests, it worked perfectly!


I baked 4 little mini cupcakes and wrote the baby's name on them and they were set on top after the cake got there.  So cute!

Notes on using sugar sheets:  It was my first time using them but I have used frosting sheets before.  Basically the same thing.  Cut them carefully and make sure they aren't too dry or they won't peel nicely from the backing.  If you find they are too dry and are cracking and not peeling off the paper nicely, stick a damp paper towel between the backing sheet and the package (not on the sugar side) and zip it shut for about half an hour.  It makes a HUGE difference!  Crumb coat your cake and then slather on the frosting nice and thick.  For this cake I used about 6 cups of frosting (including between the layers).  This 2 layer cake was 8"x8"x4" and took 2 sugar sheets to cover the sides and the top. If you are putting them on a cake you had previously frozen to crumb coat they may sweat some as the cake warms up.  No big deal, just something that happens.

P.s. This is what the baked layers looked like before I put it together.

Saturday, 6 October 2012

Pinteresting Pumpkin Cookies

I admit it.  I am a Pinterest junkie.  If I could spend hours on there, I would. Also, I wish there was a button I could click when I actually complete a pin and I would be rewarded with a round of applause!  My most recent success was with a batch of pumpkin cookies.  It was soooo hard to only eat two and make sure that there will be some left for Thanksgiving supper with my family!  I will definitely be making these again! Thumbs up delish!

Original pin links up with MyBakingAddiction:


My results:

Fluffy pumpkin batter


Baked cookies were not pretty on top, but that is what icing is for!


Mmmmmm yummy! (it was hard to stop nibbling to take the picture!)


Wednesday, 4 July 2012

Powdered peanut butter? Yes, have some!

So a while back I discovered PB2 powdered peanut butter made by Bell Plantation on amazon.com.  I held off ordering some because I just wasn't sure if I was willing to try it.  Well, I finally got some and I LOVE it!!  It has all the oil sucked out of it so it has 85% less fat and calories than regular peanut butter!!  First I tried it reconstituted and was pleasantly surprised at the taste and texture of it (though I used just a touch more water than they suggest on the package).  I can't even take credit for Zane's idea to try making peanut butter cookies with it but I can completely take credit for the following recipe!!


PB2 Hugs cookies
PB2 Hugs cookies


PB2 Hugs Cookies

1 c. margarine
3/4 c. white sugar
1 c. golden yellow sugar
2 tsp. vanilla
1 tsp. cinnamon
1 tsp. salt
2 eggs
1 tsp. baking soda
1 tsp. baking powder
2 3/4 c. flour
1/3 c. PB2 powdered peanut butter
1 1/2 c. Hershey's mini hugs

Combine margarine, sugars, vanilla, salt, cinnamon, salt and eggs and whip up until fluffy.  Add flour, PB2 peanut butter, soda and powder and mix well.  Add mini hugs during last few seconds of mixing.  Drop by tablespoonful or cookie scoop full onto non stick baking sheet.  Bake at 350 degrees for 10 minutes.


p.s. this is what the PB2 powdered peanut butter looks like in the compressed brick
Wonder what peanutty creation will be next!! These sure turned out well!!

Wednesday, 2 May 2012

Cheeseburger Egg Rolls

Ever wonder how Asian restaurants who claim to handroll their egg or spring rolls manage to keep up to demand?  It never really crossed my mind until a few weeks ago when I decided to experiment with some egg roll wrappers.  Now I had seen  Rachael Ray make cheeseburger egg rolls so naturally I assumed I could successfully replicate them.  After my first attempt I learned 2 things.  1- They tasted awesome, and 2- my egg rolls looked nothing like the ones she made and resembled square pouches more than rolls.  That being said, I had to try again and again and again.  Finally got it! 
Here's how I did it:

1- Cook up your filling.  I didn't take a picture this time, mine was just a pot of ground beef with taco seasoning in it this time.  I have made it a few different ways, sometimes cutting in some veggies or adding in mushroom soup. This is the place to get creative


2 - Lay out an egg roll wrapper and using a pastry brush dipped in water, moisten 2 sides.  This will help the roll stay together once you roll it up.


3- Put just a pinch or two of grated cheese of your choice in the center of the wrapper


4 - I used a scooper to measure out the amount of meat mixture I wanted inside.  Use your judgement on how much you want in there.


5 - Roll up like an egg roll tucking ends in as best you can. Place on a greased rack on top of a baking sheet.  Make sure the side the cheese is on is ON TOP.  If you leave the cheese side down you will end up with a big goopy mess under the rack and the bottoms will fall out of your Cheeseburger Egg Rolls.  (yep I know that from experience)  The more you roll up the better they look. Practice makes perfect!


6 - Brush with an egg wash.  Place baking sheet in pre-heated 425 degree oven for 15 minutes or until edges start to crisp up.  Be careful not to crisp them up too much or they are hard to eat!


Voila!  Cheeseburger Egg Rolls!  Each one is only 110 Calories, 5.3 grams of fat and 4.3 grams of carbs.  (according to recipe information plugged into My Fitness Pal) Not too shabby!


Adventures (and disasters) in Baking

 So normally I am a half decent baker, not scared to take a risk or try something new to create a fantastic recipe...not today.  Today, being a rainy, gross day out, I decided to bake some brownies...with a twist.  I love s'mores, so I figured hey why not add some marshmallows halfway through the baking time!  It should end up with some nice toasted tops and ooey gooey goodness.  Well ooey gooey is one way to describe the mess I had after!  I should also mention, someone told me next time I bake brownies I should try covering the whole inside of my pan with tinfoil so it is easier to cut after.  


25 minutes in when I added the marshmallows


And this is the mushy mess I was left with after another 20 minutes in the oven.


Lessons I learned:  Tinfoil in my pan made cleanup a whole bunch easier.  I won't however be putting tinfoil in the pan next time I do brownies, when I did attempt cutting them I ended up with all kinds of little bits of foil stuck in my food.  Also this idea probably would have worked out much better if I had used mini marshmallows - and not too many of them!  My favorite learning experience from this though was that ooey gooey brownie marshmallowy mush tastes fantastic when warm and eaten with a spoon with some creamy vanilla ice cream!